- Advertisement -

Home Blog Page 373

Express yourself: A guide to expressing breastmilk for new mums

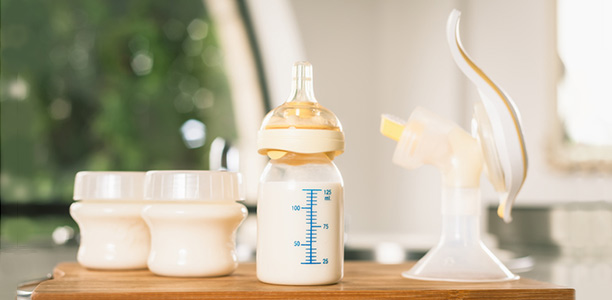
Here’s a handy rundown of expressing breastmilk for new mums, a technique where you can release your mamma’s milk, either manually or with a pump, so you can store it and feed your bub at another time.

Expressing is the best way to ensure your baby gets the nutrients it needs from your milk, even if you are separated by work or hospitalisation.

Simply the ‘breast’

Breastmilk production is a brilliant system – milk is made at the same rate at which it is expelled. If none is expelled, then it isn’t produced. This milky wonder is controlled by the pituitary gland in your brain. It works the best when you are expelling milk regularly, and your body knows it should keep up a constant supply. Basically, you become a one-woman milk factory, and you don’t even have to think about it.

Why express?

There are different reasons why you may choose to express breastmilk either some or all the time. Sometimes babies have difficulty latching on to the breast, especially if they were premature. Other times, mums and bubs have to be separated, often because of hospitalisation, work or babysitting. There’s nothing wrong with having a night off and leaving your baby with a bottle if you feel you need to get out of the house. So baby can have his or her milk – and drink it too.

Other times it is a question of ‘breast’. Perhaps your nipples are cracked or sore and they too need a break, or your boobs are engorged so you need to expel to feel comfortable. Also, if your supply is low, often expressing milk will stimulate production.

… and when?

You can start expressing straight after childbirth. Sometimes it’s necessary if bubba doesn’t want to suckle. The stimulation of the nipple will kick start the lactation process. Usually in the first week after childbirth, it is recommended to manually express your breastmilk. You can move on to a pump shortly after, when you (or your partner!) notice your breasts are fuller.

If you do start expressing milk straight after giving birth, you will need to express quite regularly, about 8–10 times per day. You may even need to express every 1.5 hours. Once lactation has kicked in, you can tone it down to every 3–4 hours, or about 6–8 times per day.

If you are suckling your little one and only want to express sometimes, perhaps for a night out, then you only need to express what your baby will need.

For women who need to express excess milk due to mastitis or blocked ducts, they should express as much remaining milk as they can each time the baby suckles.

If you want to increase your supply of breastmilk, try expressing milk from each breast until empty, 2–3 times per sitting (in a row).

Women who have missed suckling their infant or expressing their milk at least once may try expressing several times in close succession, to ensure a minimum of six milk expresses for the day. This will help to maximise their milk supply.

How much of the good stuff?

Here’s a table you can use as an approximate guide to how much you should be expressing for each purpose. If you become concerned about your quantity, see you GP for further guidance.

Reason for expressing Amount of milk which should be expressed
Breasts are engorged or uncomfortable because they are too full Express only as much breastmilk as is required to reduce the feeling of engorgement or discomfort.
Blocked duct or mastitis Express as much breastmilk as possible after the infant has finished suckling.
To store breastmilk for emergency use Express as much milk as is needed for storage.
For regular infant feeding Express as much milk as possible and fully drain both breasts each time. In the first days after childbirth, it may only be possible to express a few drops or millilitres of breastmilk. Women will typically express 50–75 mL from each breast each time they express, 4–5 days after childbirth. This will increase to 80–120 mL by the end of the first week. Once regular breastmilk production is established, women express 440–1,200 mL of breastmilk each day.Women who sometimes suckle their infant (e.g. when they are not at work) may also wish to try expressing a little breastmilk after each suckling.It is important to note that the quantity of milk a woman is able to express differs from day to day, and one breast often expresses more milk than the other.


How is breastmilk expressed?

Relaxation is the key to expressing. So find a lovely spot with some soothing music, perhaps after a warm shower, and place a warm towel on the breast. Then gently massage the breast and nipple to encourage the ‘let-down reflex’.

If your baby isn’t around while you’re trying to express, it can help to keep a photo with you. Remember to eat beforehand so you have all the nutrients you need, and speak to people if you need some support, whether it be a partner, friend or professional.

Regardless of whether you are using a manual technique or a pump, reducing the risk of your baby’s infection is very important, so always:

  • Wash your hands thoroughly before starting;
  • Sterilise the cups, sealed bottles and their components (e.g. lids) in which expressed milk will be stored before starting;
  • Ensure your hands do not touch the inside of containers used for storing breastmilk;
  • Sterilise the breastmilk pump and its components (if using such a device); and
  • Store breastmilk in the fridge immediately after expressing.

Finger food: Expressing breastmilk by hand

Don’t stress if this is a little difficult at first – it’s normal, and your baby has a very small stomach so you don’t need much. As you get the hang of it and your child grows, you will start to naturally produce more. You shouldn’t feel any pain, but if your nipples are sore, you can dab a small amount of breastmilk on each after feeding.

Here is a general technique for expressing milk manually:

  • Place the thumb and index finger of one hand on either side of the areola (the dark-coloured section surrounding the nipple), well back from the nipple;
  • Move the thumb and index finger, first pressing them back into the breast and then squeezing them together behind the nipple for about two seconds;
  • Continue moving the thumb and index finger in the above motion, until milk starts to be secreted;
  • When the flow of milk ceases, move the thumb and index finger to a different position on the areola of the same breast;
  • Move the thumb and forefinger in the same motion again;
  • Repeat the motion, using up to five different positions on the areola, until the flow of breastmilk ceases. It is important to empty the first breast before starting to express from the second breast;
  • Repeat for the other breast.

If milk is being expressed because the supply is low, the woman should express milk from each breast until it is empty, 2–3 times in a row.

Pump class: Using a breast pump

Breast pumps are commonly used by women who express milk and are usually more effective from 4–5 days after childbirth (before that, hand expressing is recommended).

Single or double cup pumps are available, which respectively allow women to express milk from one breast at a time or both breasts simultaneously – probably a good idea if you want to save time. There are different types, including electronic or manual, and you can even hire one for a trial if you want to ‘try before you buy’.

With any pump, you must make sure they are always clean for your bubba. So always ensure it is clean and disassemble it fully when doing a proper wash. Use hot water with a little dishwashing liquid, and don’t clean it with sponges used for other purposes. Dry it off with a paper towel and store in a clean plastic container or paper towels.

You don’t need to take it apart every time if you are expressing a lot, but always rinse it in cold water after every session. You can also sterilise it occasionally with boiling water or a solution.

Your breast pump will come with instructions. Remember, it shouldn’t be painful, so always check you have it properly in place.

Your boobs are truly amazing (as your partner will agree) so be gentle with them. If you experience problems, don’t hesitate to talk to your GP.

Booby trap: Caffeine and breastfeeding

Cup of black coffee
Cup of black coffee

Nursing infants don’t get much say when it comes to choosing what’s on the menu. If you’re breastfeeding, whatever you’re selecting, so is your baby. When it comes to selecting caffeine, babies are sensitive, so mothers may need to cut down to make sure it doesn’t cause any damage to their baby’s health. After all, caffeine is a drug, and if it can jack you up before a big day at work, imagine how strong it is for a tiny little person.

Psychoactive sensation

It’s well established that the drug caffeine is a popular sensation – but it’s also a psychoactive one. This means it works by stimulating the nervous system, which is why it’s so great at relieving fatigue. Unfortunately, new mums are probably the most tired of us all, and if mums are breastfeeding, too much coffee or energy drinks won’t be worth it in the long run.

How much is too much?

Breastfeeding mums can still have the occasional cup of coffee, but should limit the amount of caffeine they consume to no more than 300 mg per day. This equates to 2–3 cups of filtered coffee per day, and should be even less if you’re smoking, which has been shown to increase the health risks associated with caffeine.

The Mum-to-bub caffeine express

Caffeine is a smart drug; it can work its way into breast milk and right into your baby’s mouth within 15 minutes of a cuppa. The concentration of caffeine in breastmilk actually peaks about an hour after you have consumed it.

The levels of caffeine in your breastmilk gradually lower in the next 14 hours. But even though the levels are lower, they will still be large enough to affect your baby. Tough gig, huh?

Baby boom: Caffeine in an infant’s body

Very young infants have ‘immature’ metabolic systems. This is the newborn equivalent of an adolescent not cleaning their room, except the baby’s room is their liver. This means they can’t process and expel drugs from their body – they certainly haven’t had as much practice as us oldies, either – so it takes about 8 days to metabolise most of the caffeine passed on in breastmilk from 6–8 cups of coffee.

If you’re thinking that’s a long time for caffeine to be knocking ’round in your baby … it is.

Luckily, by the time a baby is 6 months old, the same amount of caffeine can be cleared in about two and a half hours. The younger the baby, the longer it takes to metabolise.

Grumblebums

Whatever their age, if there is more caffeine in a baby’s system than they can metabolise, the caffeine will start building up in their system and stimulate their nervous system, just as it would with any adult.

The effects of this for your baby will be agitation, being jittery or unsettled, and sleeping difficulties. Mothers know that when it comes to sleeping, babies are tough customers as it is, so cutting out the caffeine is one way of limiting the long nights.

Dental cavities and intestinal problems may be more common in infants of breastfeeding mums who are consuming too much caffeine too, so give your baby a break. No one likes being constipated!

What about me?

All this might sound like a bit of a bummer for new mums, especially when all you want is a hot cup of coffee and a big block of chocolate. But you’re also doing yourself a favour by cutting down on the caffeine.

Firstly, caffeine consumption may inhibit the production of breastmilk – as if you didn’t have enough worries! This means you may not produce enough to feed your baby properly, so you both suffer.

High caffeine intake also affects the quality of your breastmilk and can reduce the iron content by a third. You may also experience uncomfortable breast inflammation and difficulty breastfeeding.

Say no to drugs

As you can see, caffeine might be common, but it’s still a very strong drug that can affect both you and your baby. By cutting down to just 2 or 3 cups a day, you can keep your milk running like a tap and keep baby sleeping like a … well, baby.

If you have any problems, then just book in with your GP to talk about techniques for getting off the black stuff.

More information

Caffeine  and breastfeeding For more information, see Caffeine Consumption While Breastfeeding.

Pit and fissure sealants: How they prevent cavities in children's teeth

no front teeth
no front teeth

Teeth have natural dips or grooves in them, known as pits and fissures. It’s all very groovy in one sense, but when it comes to keeping your children’s teeth clean and free of cavities, pits and fissures aren’t groovy at all.
Pits and fissures house bacteria and other substances which can cause tooth decay in children, and these grooves can’t always be properly cleaned with a normal toothbrush. Thankfully dentists have developed pit and fissure sealants which can fill and seal the grooves in children’s teeth and prevent bacteria getting in. They make teeth easier to clean and reduce the risk a child will experience tooth decay.
Fissure sealants are recommended for filling the adult or primary teeth of children who have a high risk of developing cavities. And even children who brush and floss regularly can be considered high risk, depending for example on the amount of fluoride they consume and the shape of their teeth (particularly the groovy parts).

checkmark Children are not always able to clean their teeth properly with a normal toothbrush.
checkmark Pit and fissure sealants may make it easier for your child to clean their teeth properly, especially if they have deep and narrow pits and grooves in their teeth.
checkmark Dentists may recommend sealants for your child even if they brush and floss their teeth regularly.

Kid’s teeth are often groovy, baby

Kid’s teeth are often groovy. There are two types of grooves that may be found in the biting surface of teeth, known as pits and fissures. As the name suggests, pits are small indentations (pits) in the tooth’s dental enamel (the hard covering which protects the tooth from bacteria and other nasties).
Fissures are the grooves which form naturally and give shape and texture to the biting surface of ‘chewing’ teeth at the back of the mouth (called molars and premolars). They typically only affect the ‘chewing’ teeth, but in a minority of exceptionally groovy children the ‘biting’ teeth at the front of the mouth (called canines and incisors) may also have fissures. While teeth fissures are visible to the naked eye as grooves running through the teeth, the bottom-most point of the fissure cannot be seen. It may be so narrow that the bristles of a toothbrush are too wide to enter and clean the grooves.

Brushing teeth just doesn’t cut it

No matter how thoroughly your child cleans and flosses their teeth, completely removing bacteria and other nasties from fissures is impossible if the grooves are too narrow. The pits and fissures in teeth which cannot be cleaned provide shelter for bacteria, making it much easier for them to take up permanent residence in your child’s mouth and cause tooth decay.
Dental cavities are five times more likely to occur in pits and fissures than in the edges which border the spaces between teeth, as the spaces can be cleaned with dental floss to remove bacteria which might otherwise cause tooth decay. Research shows that the vast majority (84%) of all holes in kids’ teeth occur in the pits and fissures. However, research also shows that the likelihood of your child developing holes in these places can be substantially reduced by filling the grooves.
Teeth protected with fissure sealants are 22 times less likely to decay than unprotected teeth. Now those are good odds, but only around 20% of children have fissure sealants. Dentists believe that if sealants were more common, tooth decay in children would be less common.

What’s in a fissure seal?

Fissure sealants made from materials called glass ionomer cement or composite resin can be used to seal up these pesky grooves. Research shows that these substances are not only effective in preventing cavities; they’re also safe to place in a child’s mouth. The sealants form a mechanical barrier which prevents bacteria and other nasties entering the grooves and considerably reduces the likelihood of cavities forming in the grooves.
Ultimately the seals prevent tooth decay. One year after the sealants have been put in place, a child is 80% less likely to get a cavity. After two years they are 70% less likely to have a cavity, compared to children who do not have fissure sealants.

Which kids need fissure sealants?

Not all children require fissure sealants. As a general rule, they’re recommended for filling the molars of kids with a high risk of tooth decay, such as those who have already had a couple of dental cavities filled and those who lack fluoride in their drinking water.
There are also features of the teeth that can determine whether or not fissure sealants should be applied. Permanent teeth (second set of teeth or adult teeth) which have just emerged through the gums, and those with grooves which are particularly deep or narrow, are most likely to benefit from fissure sealants. If your child requires fissure sealants, it’s recommended that they’re put in place as soon as possible after their permanent teeth emerge through the gums.

Which kids do not need fissure sealants?

Teeth which are still breaking through the gums into the mouth should not be sealed, nor should teeth that have already developed cavities. However, rest assured that that if a fissure sealant is inadvertently placed over a small area of tooth decay, research has shown the sealant will prevent rather than encourage further decay; it seems that bacteria find it much harder to live and cause tooth decay under a sealant than when they are exposed to saliva and the normal environment of the mouth.
If a child’s adult teeth have been in place for more than 4 years and haven’t experienced decay, they won’t need to be sealed. Your dentist can advise you on whether your child has the type of teeth which will benefit from being sealed.

checkmark Be aware of risk factors for tooth decay, such as having previously had dental cavities and drinking water which does not contain fluoride (e.g. bottled mineral water rather than fluoridated tap water).
checkmark Take your child to the dentist as soon as their adult teeth emerge through the gums- if they do need fissure sealants, this is the best time to place them.
checkmark Fissure sealants cannot be put in place until the adult teeth have broken through the gums.
checkmark Don’t be concerned about teeth decaying under a fissure sealant- if a tooth has already started to decay, placing the fissure seal will slow down the decaying process.
checkmark Talk to your dentist for more advice about whether fissure sealants are appropriate for your child.

Types of sealants

There are several different styles of pit and fissure sealants, for example clear or opaque sealants. Your dentist can advise you about the pros and cons of each sealant style, and allow you to decide which is most suitable for your child’s teeth. Once you’ve decided, the fissure sealants only take about 10 minutes to put in place and can be applied by a dentist, dental therapist or dental hygienist.

checkmark Talk to your dentist about the benefits and disadvantages of different types of fissure sealants.
checkmark If your child needs a sealant, choose the type of sealant which you think is best for your child’s teeth.

Applying the good stuff to prevent tooth decay

To place the sealant, your child’s dentist will clean the tooth to ensure there are no particles of food or other contaminants stuck to it and then dry it thoroughly, as the sealant can only stick properly to a tooth that is perfectly clean and dry. Next a chemical which works like glue to ensure the sealant bonds to the tooth is applied. Then the sealant is added to fill the grooves and keep food particles and bacteria out.
The sealant is allowed to dry, until it is hard and durable. Sometimes the dentist will shine a strong light on the sealant to help it set. Your child’s bite will be checked, and if the sealant has affected the way your child’s teeth press together, it may be necessary to polish away tiny amounts of the sealant to correct this. Once in place, your child’s teeth will have additional protection from decay-causing bacteria for up to seven years.

Long time in the tooth: How long do fissure sealants last?

About half of all fissure sealants placed in children’s teeth stay in place for 7 years, however the other half move or fall out sooner than this and need to be replaced. It’s more likely that fissure sealants will fall out if the teeth have tiny bits of saliva or food caught on them when the sealants are applied, which is why thoroughly cleaning and drying the teeth before applying the sealant is so important.
About 30% of sealants become dislodged and need to be reapplied once. Another 20% of sealants need to be reapplied two or three times. Fissure sealants usually dislodge within 6 months of placement, and if this happens, your dentist will notice during a routine dental check-up. So you’ll need to continue taking your child to the dentist every 6–12 months to check up on the fissure sealants, but this is recommended as part of good dental health for children anyway.
Other complications are rare, and if they do occur are minor. For example a few children find the sealants uncomfortable for their teeth or gums, or are hypersensitive (allergic) to the ingredients in the sealant. But this is uncommon, and for most children sealants are an easy way to protect their teeth and make them easier to clean.

checkmark Ensure your child brushes their teeth thoroughly before going to the dentist to have fissure seals applied.
checkmark Continue taking your child for regular dental check-ups (every 6-12 months) once the sealants have been put in.

Pearly whites: How to keep your kid’s teeth healthy

It’s important to remember that fissure sealants are not a magic solution to tooth decay. They are just one part of a multi-dimensional dental hygiene routine which should involve brushing and flossing, regular trips to the dentist and avoidance of foods which promote tooth decay. For example, consuming lots of sugary foods and drinks is more likely to cause holes in a child’s teeth than eating healthy options.
But adding fissure sealants to some good old-fashioned brushing and flossing and regular check-ups with the dentist is an excellent recipe for ensuring that your child’s teeth will be pearlers.

checkmark Remember that fissure sealants are not a magic solution to tooth decay.
checkmark Ensure that your child continues to brush and floss regularly once their fissure sealants have been put in place.
checkmark Ensure your children avoid foods which promote tooth decay such as sweets and sugary drinks.

The sealed tooth will set you free

Fissure sealants are a great way to protect your child’s teeth from decay. They are easy and fast for your child’s dentist to put in place, and typically last a long time. Given that more than four in every five cavities occur in the grooves of teeth, it’s not surprising that fissure sealants drastically reduce the chance of tooth decay. Talk to your dentist about fissure sealants, so you can do the best for your child’s chompers.

Download

pit_fissure_checklist_thumbnail_100x100 Download the pit and fissure sealants checklist


You might also like…

A thoughtful baby boy in the bed on the white background Teething


References

  1. Cameron A, Widmar R. Handbook of Paediatric Dentistry. London: Mosby; 1997. (Book)
  2. Mitchell DA, Mitchell L. Oxford Handbook of Clinical Dentistry (4th edition). New York: Oxford University Press; 2005. (Book)
  3. Patient education pamphlets: Fissure sealants (brochure). Australian Dental Association; 2009.
  4. Roberson TM, Heymann HO, Swift EJ Jr (eds). Studervant’s Art and Science of Operative Dentistry (4th edition). St Louis: McGraw-Hill; 2002. (Book)
  5. National Center of Health Statistics. Plan and operation of the Third National Health and Nutrition Examination Survey (NHANES III), 1988-1994 (PHS publication no. 94-1308). Vital Health Stat 1. 1994;(32):1-407. Available from: (URL link)
  6. Dental Product Spotlight: Pit and fissure sealants. J Am Dent Assoc. 2002;133(9):1275. (Full text)
  7. Ripa LW. Occlusal sealants: Rationale and review of clinical trials. Int Dent J. 1980;30(2):127-39. (Abstract)
  8. Straffon LH, Dennison JB. Clinical evaluation comparing sealant and amalgam after 7 years: Final report. J Am Dent Assoc. 1988;117(6):751-5. (Abstract)
  9. Leverett DH, Handelman SL, Brenner CM, Iker HP. Use of sealants in the prevention and early treatment of carious lesions: Cost analysis. J Am Dent Assoc. 1983;106(1):39-42. (Abstract)
  10. Azarpazhooh A, Main PA. Pit and fissure sealants in the prevention of dental caries in children and adolescents: A systematic review. J Can Dent Assoc. 2008;74(2):171-7. (Abstract | Full text)
  11. Newman M, Takei H, Klokkevold P. Carranza’s Clinical Periodontology. 10th ed. Carranza F, editor. St Louis: Saunders, Elsevier; 2006.
  12. Gustafsson BE, Quensel CE, Lanke LS, Lundqvist C, Grahnen H, Bonow BE, et al. The Vipeholm dental caries study: The effect of different levels of carbohydrate intake on caries activity in 436 individuals observed for five years. Acta Odontol Scand. 1954; 11(3-4): 232-64.
  13. Simonsen RJ. Cost effectiveness of pit and fissure sealant at 10 years. Quintessence Int. 1989;20(2):75-82. (Abstract)

Pit and fissure sealants: How they prevent cavities in children’s teeth

no front teeth
no front teeth

Teeth have natural dips or grooves in them, known as pits and fissures. It’s all very groovy in one sense, but when it comes to keeping your children’s teeth clean and free of cavities, pits and fissures aren’t groovy at all.

Pits and fissures house bacteria and other substances which can cause tooth decay in children, and these grooves can’t always be properly cleaned with a normal toothbrush. Thankfully dentists have developed pit and fissure sealants which can fill and seal the grooves in children’s teeth and prevent bacteria getting in. They make teeth easier to clean and reduce the risk a child will experience tooth decay.

Fissure sealants are recommended for filling the adult or primary teeth of children who have a high risk of developing cavities. And even children who brush and floss regularly can be considered high risk, depending for example on the amount of fluoride they consume and the shape of their teeth (particularly the groovy parts).

checkmark Children are not always able to clean their teeth properly with a normal toothbrush.
checkmark Pit and fissure sealants may make it easier for your child to clean their teeth properly, especially if they have deep and narrow pits and grooves in their teeth.
checkmark Dentists may recommend sealants for your child even if they brush and floss their teeth regularly.

Kid’s teeth are often groovy, baby

Kid’s teeth are often groovy. There are two types of grooves that may be found in the biting surface of teeth, known as pits and fissures. As the name suggests, pits are small indentations (pits) in the tooth’s dental enamel (the hard covering which protects the tooth from bacteria and other nasties).

Fissures are the grooves which form naturally and give shape and texture to the biting surface of ‘chewing’ teeth at the back of the mouth (called molars and premolars). They typically only affect the ‘chewing’ teeth, but in a minority of exceptionally groovy children the ‘biting’ teeth at the front of the mouth (called canines and incisors) may also have fissures. While teeth fissures are visible to the naked eye as grooves running through the teeth, the bottom-most point of the fissure cannot be seen. It may be so narrow that the bristles of a toothbrush are too wide to enter and clean the grooves.

Brushing teeth just doesn’t cut it

No matter how thoroughly your child cleans and flosses their teeth, completely removing bacteria and other nasties from fissures is impossible if the grooves are too narrow. The pits and fissures in teeth which cannot be cleaned provide shelter for bacteria, making it much easier for them to take up permanent residence in your child’s mouth and cause tooth decay.

Dental cavities are five times more likely to occur in pits and fissures than in the edges which border the spaces between teeth, as the spaces can be cleaned with dental floss to remove bacteria which might otherwise cause tooth decay. Research shows that the vast majority (84%) of all holes in kids’ teeth occur in the pits and fissures. However, research also shows that the likelihood of your child developing holes in these places can be substantially reduced by filling the grooves.

Teeth protected with fissure sealants are 22 times less likely to decay than unprotected teeth. Now those are good odds, but only around 20% of children have fissure sealants. Dentists believe that if sealants were more common, tooth decay in children would be less common.

What’s in a fissure seal?

Fissure sealants made from materials called glass ionomer cement or composite resin can be used to seal up these pesky grooves. Research shows that these substances are not only effective in preventing cavities; they’re also safe to place in a child’s mouth. The sealants form a mechanical barrier which prevents bacteria and other nasties entering the grooves and considerably reduces the likelihood of cavities forming in the grooves.

Ultimately the seals prevent tooth decay. One year after the sealants have been put in place, a child is 80% less likely to get a cavity. After two years they are 70% less likely to have a cavity, compared to children who do not have fissure sealants.

Which kids need fissure sealants?

Not all children require fissure sealants. As a general rule, they’re recommended for filling the molars of kids with a high risk of tooth decay, such as those who have already had a couple of dental cavities filled and those who lack fluoride in their drinking water.

There are also features of the teeth that can determine whether or not fissure sealants should be applied. Permanent teeth (second set of teeth or adult teeth) which have just emerged through the gums, and those with grooves which are particularly deep or narrow, are most likely to benefit from fissure sealants. If your child requires fissure sealants, it’s recommended that they’re put in place as soon as possible after their permanent teeth emerge through the gums.

Which kids do not need fissure sealants?

Teeth which are still breaking through the gums into the mouth should not be sealed, nor should teeth that have already developed cavities. However, rest assured that that if a fissure sealant is inadvertently placed over a small area of tooth decay, research has shown the sealant will prevent rather than encourage further decay; it seems that bacteria find it much harder to live and cause tooth decay under a sealant than when they are exposed to saliva and the normal environment of the mouth.

If a child’s adult teeth have been in place for more than 4 years and haven’t experienced decay, they won’t need to be sealed. Your dentist can advise you on whether your child has the type of teeth which will benefit from being sealed.

checkmark Be aware of risk factors for tooth decay, such as having previously had dental cavities and drinking water which does not contain fluoride (e.g. bottled mineral water rather than fluoridated tap water).
checkmark Take your child to the dentist as soon as their adult teeth emerge through the gums- if they do need fissure sealants, this is the best time to place them.
checkmark Fissure sealants cannot be put in place until the adult teeth have broken through the gums.
checkmark Don’t be concerned about teeth decaying under a fissure sealant- if a tooth has already started to decay, placing the fissure seal will slow down the decaying process.
checkmark Talk to your dentist for more advice about whether fissure sealants are appropriate for your child.

Types of sealants

There are several different styles of pit and fissure sealants, for example clear or opaque sealants. Your dentist can advise you about the pros and cons of each sealant style, and allow you to decide which is most suitable for your child’s teeth. Once you’ve decided, the fissure sealants only take about 10 minutes to put in place and can be applied by a dentist, dental therapist or dental hygienist.

checkmark Talk to your dentist about the benefits and disadvantages of different types of fissure sealants.
checkmark If your child needs a sealant, choose the type of sealant which you think is best for your child’s teeth.

Applying the good stuff to prevent tooth decay

To place the sealant, your child’s dentist will clean the tooth to ensure there are no particles of food or other contaminants stuck to it and then dry it thoroughly, as the sealant can only stick properly to a tooth that is perfectly clean and dry. Next a chemical which works like glue to ensure the sealant bonds to the tooth is applied. Then the sealant is added to fill the grooves and keep food particles and bacteria out.

The sealant is allowed to dry, until it is hard and durable. Sometimes the dentist will shine a strong light on the sealant to help it set. Your child’s bite will be checked, and if the sealant has affected the way your child’s teeth press together, it may be necessary to polish away tiny amounts of the sealant to correct this. Once in place, your child’s teeth will have additional protection from decay-causing bacteria for up to seven years.

Long time in the tooth: How long do fissure sealants last?

About half of all fissure sealants placed in children’s teeth stay in place for 7 years, however the other half move or fall out sooner than this and need to be replaced. It’s more likely that fissure sealants will fall out if the teeth have tiny bits of saliva or food caught on them when the sealants are applied, which is why thoroughly cleaning and drying the teeth before applying the sealant is so important.

About 30% of sealants become dislodged and need to be reapplied once. Another 20% of sealants need to be reapplied two or three times. Fissure sealants usually dislodge within 6 months of placement, and if this happens, your dentist will notice during a routine dental check-up. So you’ll need to continue taking your child to the dentist every 6–12 months to check up on the fissure sealants, but this is recommended as part of good dental health for children anyway.

Other complications are rare, and if they do occur are minor. For example a few children find the sealants uncomfortable for their teeth or gums, or are hypersensitive (allergic) to the ingredients in the sealant. But this is uncommon, and for most children sealants are an easy way to protect their teeth and make them easier to clean.

checkmark Ensure your child brushes their teeth thoroughly before going to the dentist to have fissure seals applied.
checkmark Continue taking your child for regular dental check-ups (every 6-12 months) once the sealants have been put in.

Pearly whites: How to keep your kid’s teeth healthy

It’s important to remember that fissure sealants are not a magic solution to tooth decay. They are just one part of a multi-dimensional dental hygiene routine which should involve brushing and flossing, regular trips to the dentist and avoidance of foods which promote tooth decay. For example, consuming lots of sugary foods and drinks is more likely to cause holes in a child’s teeth than eating healthy options.

But adding fissure sealants to some good old-fashioned brushing and flossing and regular check-ups with the dentist is an excellent recipe for ensuring that your child’s teeth will be pearlers.

checkmark Remember that fissure sealants are not a magic solution to tooth decay.
checkmark Ensure that your child continues to brush and floss regularly once their fissure sealants have been put in place.
checkmark Ensure your children avoid foods which promote tooth decay such as sweets and sugary drinks.

The sealed tooth will set you free

Fissure sealants are a great way to protect your child’s teeth from decay. They are easy and fast for your child’s dentist to put in place, and typically last a long time. Given that more than four in every five cavities occur in the grooves of teeth, it’s not surprising that fissure sealants drastically reduce the chance of tooth decay. Talk to your dentist about fissure sealants, so you can do the best for your child’s chompers.

Download

pit_fissure_checklist_thumbnail_100x100 Download the pit and fissure sealants checklist


You might also like…

A thoughtful baby boy in the bed on the white background Teething


References

  1. Cameron A, Widmar R. Handbook of Paediatric Dentistry. London: Mosby; 1997. (Book)
  2. Mitchell DA, Mitchell L. Oxford Handbook of Clinical Dentistry (4th edition). New York: Oxford University Press; 2005. (Book)
  3. Patient education pamphlets: Fissure sealants (brochure). Australian Dental Association; 2009.
  4. Roberson TM, Heymann HO, Swift EJ Jr (eds). Studervant’s Art and Science of Operative Dentistry (4th edition). St Louis: McGraw-Hill; 2002. (Book)
  5. National Center of Health Statistics. Plan and operation of the Third National Health and Nutrition Examination Survey (NHANES III), 1988-1994 (PHS publication no. 94-1308). Vital Health Stat 1. 1994;(32):1-407. Available from: (URL link)
  6. Dental Product Spotlight: Pit and fissure sealants. J Am Dent Assoc. 2002;133(9):1275. (Full text)
  7. Ripa LW. Occlusal sealants: Rationale and review of clinical trials. Int Dent J. 1980;30(2):127-39. (Abstract)
  8. Straffon LH, Dennison JB. Clinical evaluation comparing sealant and amalgam after 7 years: Final report. J Am Dent Assoc. 1988;117(6):751-5. (Abstract)
  9. Leverett DH, Handelman SL, Brenner CM, Iker HP. Use of sealants in the prevention and early treatment of carious lesions: Cost analysis. J Am Dent Assoc. 1983;106(1):39-42. (Abstract)
  10. Azarpazhooh A, Main PA. Pit and fissure sealants in the prevention of dental caries in children and adolescents: A systematic review. J Can Dent Assoc. 2008;74(2):171-7. (Abstract | Full text)
  11. Newman M, Takei H, Klokkevold P. Carranza’s Clinical Periodontology. 10th ed. Carranza F, editor. St Louis: Saunders, Elsevier; 2006.
  12. Gustafsson BE, Quensel CE, Lanke LS, Lundqvist C, Grahnen H, Bonow BE, et al. The Vipeholm dental caries study: The effect of different levels of carbohydrate intake on caries activity in 436 individuals observed for five years. Acta Odontol Scand. 1954; 11(3-4): 232-64.
  13. Simonsen RJ. Cost effectiveness of pit and fissure sealant at 10 years. Quintessence Int. 1989;20(2):75-82. (Abstract)

Maternity bras

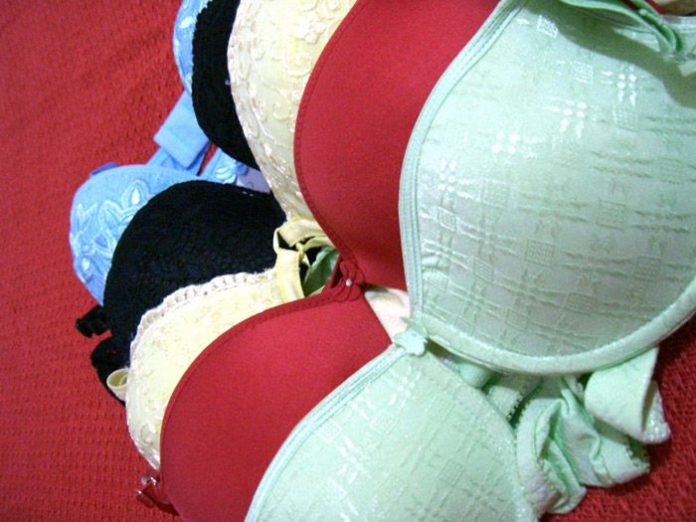
Maternity bras, also sometimes called nursing bras, are supportive bras with cups which clip open and closed at the front, to enable easy breastfeeding. Women who are not planning to breastfeed their baby may simply wear a bigger, more comfortable normal bra. Although you will not start breastfeeding until your baby is born, and thus will not need the easy-open cups until that time, there are many reasons why you may choose to start wearing a maternity bra during pregnancy. Even if you are not intending to breastfeed, your breasts will start producing breastmilk during pregnancy, and as they do so, they will increase in size. Sooner or later, you’ll probably have no choice but to buy a new, slightly larger bra and if you need a new bra anyway, it may be a good time to invest in a proper maternity bra.

The right maternity bra should not only feel great to wear, it should also minimise any breast symptoms you experience during pregnancy and give your breasts, which will get bigger as you progress through your pregnancy, all the support they need.

Maternity bras for relieving the breast symptoms of pregnancy and breastfeeding

Breasts undergo many changes during pregnancy and breastfeeding such as becoming sore and enlarged. Wearing a good fitting maternity bra can help relieve some of this discomfort and make it simpler to deal with leaking breasts. Find out more about maternity bras for relieving the breast symptoms of pregnancy and breastfeeding.

Buying maternity bras

You’ll probably need 2-3 maternity bras to see you through pregnancy and breastfeeding, and you’ll find them at most department stores and lingerie shops. But how do you decide which maternity bra fits best and is the right one for you? Find out more about buying maternity bras.


When to wear a maternity bra

Maternity bras are specially designed to support breasts during pregnancy and breastfeeding. When you decide to start wearing one depends on your breasts. Find out more about when to wear a maternity bra.


Breast and maternity bra care during pregnancy

Maternity bras and the breasts they support both need care and attention during breastfeeding, to prevent complications like cracked nipples and pain. Find out more about caring for your breasts and maternity bras in pregnancy and breastfeeding.

References

  1. Choosing a maternity bra (online). Malvern East, VIC: Australian Breastfeeding Association; October 2012 (cited 24 August 2013). Available from: (URL link)
  2. Breast changes during pregnancy (online). Irving, TX: American Pregnancy Association; March 2007 (cited 24 August 2013). Available from: (URL link)
  3. Exercise during pregnancy (online). Washington, DC: American Congress of Obstetricians and Gynecologists; August 2011 (cited 24 August 2013). Available from: (PDF File)
  4. Packing for the hospital or birth center (online). Irving, TX: American Pregnancy Association; January 2013 (cited 24 August 2013). Available from: (URL link)
  5. Breast changes during and after pregnancy (online). London: Breast Cancer Care; March 2012 (cited 24 August 2013). Available from: (PDF File)
  6. Ricci SS, Kyle T. Maternity and pediatric nursing. China: Lippincott, Williams and Wilkins; 2009. (URL link)
  7. Postnatal care in the first week guideline (online). Clayton, VIC: Southern Health; September 2010 (cited 24 August 2013). Available from: (PDF File)
  8. Mayo Clinic guide to a healthy pregnancy. Intercourse, PA: Good Books; 2011. (URL Link)

Workplace breastfeeding: A working lunch

If you’ve just had a baby and it’s time for you to get back to the grind, then you may have some questions about how and when it is appropriate to breastfeed bubs at the office (or construction site, or wherever you work). Breastfeeding is important for your baby’s health, but it’s difficult for some mothers, especially working mothers (who are a vital segment of the Australian workforce), to breastfeed.

There are laws that protect the rights of new mothers to breastfeed in the workplace. It’s in the best interests of everyone, so make sure you know what laws uphold your rights in the workplace – and take advantage of them.

Mother’s milk

Breastmilk is like no other food. It provides all of a baby’s nutritional requirements and can’t be reproduced artificially. Basically, a woman’s breasts are an exclusive (and healthy) infant food factory! Your breastmilk is actually living tissue. It even changes in composition as your baby grows older, so that it continues to provide for the baby’s exact nutritional needs (until six months of age). Pretty amazing stuff, hey?

Breastfeeding is also good for mums, and can speed up recovery from childbirth. Breastfeeding is also the only way to make sure you continue to produce milk – unless you breastfeed or express milk, lactation (the process through which breastmilk is produced) will cease. On the other hand, the more you breastfeed, the more milk you produce. It’s a very sweet deal.

For more information, see Breastfeeding.

Your boobs and the law

Because of the health benefits of breastmilk, women are encouraged to breastfeed their babies exclusively (that means giving them only breastmilk and no other food) for the first six months of life. Internationally, women have fundamental rights to breastfeed recognised by the World Health Organization. In Australia, those rights are legally recognised too. After all, we need those little brains to grow at their best.

Under our laws, employers are obliged to consider any requests to provide ‘family-friendly working arrangements’. Employers also have an obligation to be flexible for new parents, so don’t be afraid to communicate with your boss if you decide you would like to both work and breastfeed. Fight for your right to feed!

Unfortunately, however, there is no blanket law stating women must be able to take ‘boobie breaks’, so you will have to negotiate that individually with your boss. Just remember, you’re an important asset to your workplace, so don’t be afraid to communicate openly about this topic.

For more information, see Work and Parenting: Laws.

If you can’t feed, prepare lunch on the run

There are other ways to nourish your hungry li’l person if breastfeeding at your workplace is not an option, like expressing breastmilk, either by pump or by hand. This way you can be assured your baby is getting all the nutrients they require while you maintain your work schedule.

For more information, see Expressing Breastmilk.

Bringing home a baby – and the bacon

If you’re back at work (or planning to go back), that shouldn’t stop you from opening up your own personal milk bar for baby. When talking to your employer, it’s best to be prepared and know exactly what you want. This way, it will be easier to communicate and negotiate. For instance, you may need:

  • A private room (the ladies’ loo is not hygienic!);
  • Storage space for a breast pump (if you express milk to take home for your baby);
  • A refrigerator to store expressed breastmilk;
  • Specific break times, to meet your baby or express your breastmilk for later use; or
  • Perhaps you would like to talk to your employer about working part-time until you’ve finished breastfeeding.

Australia supports women in the workplace and everyone loves a new mum, so don’t be afraid to be clear about what kind of breastfeeding ‘program’ will help you return to work. Good things might come to those who wait, but better things could come to those who just ask nicely.

After all, your baby deserves to have their milk and drink it too.

More information

Workplace breastfeeding For more information, see Breastfeeding and the Workplace.

Abreast of the times: Breastfeeding and work

Mother breastfeeding
Brest feeding

Times, they are a-changing. Now with full-time, career minded women in the workplace, the pressures of breastfeeding have become complicated. For the near 120,000 women returning from maternity each year, many won’t be returning to a ‘breastfeeding friendly’ environment, meaning bub misses out on the best nutrition available to them for the first six months. So let’s talk about the kind of barriers women face and what we can do about them.

The stats

Ever wondered what other Mums are doing? Here are the Aussie breastfeeding statistics, so you know roughly where the norm is sitting.

Over 90% of Australian women initiate breastfeeding after childbirth.

56% continue breastfeeding until their child reaches 6 months of age.

30% are still breastfeeding 12 months after childbirth.

Although, 30% of women who are still breastfeeding until six months will mix it up a bit and use other sources of infant food.

Lunch on the go

Studies actually suggest that work isn’t the reason women stop breastfeeding, but working mothers are definitely less likely to continue. Not surprising, as women really do face so many challenges and workplace pressures of feeding while working.

Women working casual hours or who are self-employed hold the highest breastfeeding rates. However, for bubs in childcare, the rates drop, showing there may not be opportunities for women who must place their kiddies in care.

Why the ‘why’ is so important

Breast milk is absolutely the best source of nutrition for newborns. It’s got everything in one tidy package, so why not use it? For those who say, “Just use a substitute” – you can’t. Nothing even comes close.

The production of milk is stimulated by infant suckling, so basically ‘the boob knows’. The act of suckling actually helps release nifty hormones called prolactin and oxytocin from the pituitary gland. So if suckling is what stimulates the milk, then a whole work day away from baby will decrease the production of milk.

The law: You can’t fight city hall

The right to feed your child at work is internationally recognised by bodies such as the World Health Organization (WHO) and the United Nation Children’s Fund (UNICEF). So they’ve got your back if you start to feel unfairly treated.

Under Australian laws, employers have to consider any requests from families for breastfeeding, so again, if you feel you cannot, then it’s time to make some calls. Start by talking to your boss and discussing your options. Unfortunately, while there aren’t actually laws enabling women to breastfeed, the introduction of a government-funded universal parenting leave benefit in Australia from 1 January 2011 is expected to increase women’s access to paid maternity leave.

Breastfeeding-friendly workplaces

This kind of workplace is one where women:

  • Have access to a suitable facility in which they can breastfeed their infant or express their breastmilk;
  • Are provided breaks from work in order to breastfeed or express milk; and
  • Can discuss their breastfeeding needs with their employer.

To find out more, the Australian Breastfeeding Association now manages an accreditation program for breastfeeding-friendly workplaces. The program offers consultancy services to assist employers in identifying barriers to breastfeeding in the workplace, and accreditation to those employers who successfully remove these barriers and create breastfeeding-friendly workplaces.

In these environments, women should be able to breastfeed with assurance of such things as lactation breaks, proper facilities, maternity leave, support, zero harassment, arranging childcare close to work, a private room (but not a toilet!) and a variety of other measures.

This is because we now know that women who have access to this support are able to breastfeed for longer, and this develops a better work–life balance for employees. A happy worker is a happy boss, so it’s in an employer’s best interest.

Breastfeeding also improves child health. Mums will have to be away from the office less if a child is healthy, and there are studies to prove it. Plus, if a woman can keep her job, then workplaces can maintain optimum staff retention.

Express lane milk

If breastfeeding at work is just not an option, many women choose to express their milk and store it so that their babies can access it from a bottle. Women have to start expressing milk several weeks before going back to work – mostly for practice and to see how long it takes, because it can differ for each woman.

Who you gonna call? The ABA

Women who are planning to have a child or are currently breastfeeding may find support to combine work and breastfeeding from the Australian Breastfeeding Association.

The ABA has recently launched a Breastfeeding Friendly Workplace Accreditation scheme, which may enable women to identify breastfeeding-friendly workplaces, or give employers greater incentive to make their workplace breastfeeding friendly.

Employees who are members of unions should also check to see what support their union provides.

More information

 Breastfeeding and the workplace  For more information, see Breastfeeding and the Workplace.

My dog Wags


I have a dog and his name is Wags,
He eats so much that his tummy sags, (Use both hands to accentuate tummy in semi-circle motion)
His ears flip-flop, and his tail wig-wags, (Place both hands by your own ears like two dog ears and on ‘flip’ bend one hand over, then on ‘flop’ bend the other hand over. Hold up one hand and on ‘wig’ move it to the left, then on ‘wag’ move it to the right)
And when he walks he goes zig-zag. (On ‘zig’ quickly slide hips to the left and then on ‘zag’ slide them to the right)
He goes flip-flop, wiggle-waggle, zig-zag, (Place both hands by your own ears like two dog ears and on “flip” bend one hand over, then on “flop” bend the other hand over. Hold up one hand and on “wig” move it to the left, then on “wag” move it to the right. On ‘zig’ quickly slide hips to the left and then on ‘zag’ slide them to the right)
He goes flip-flop, wiggle-waggle, zig-zag. (Place both hands by your own ears like two dog ears and on “flip” bend one hand over, then on “flop” bend the other hand over. Hold up one hand and on “wig” move it to the left, then on “wag” move it to the right. On ‘zig’ quickly slide hips to the left and then on ‘zag’ slide them to the right)
I love Wags and he loves me. (Give child a big hug)


Download the printable version

Pregnancy: Exercises to do and avoid

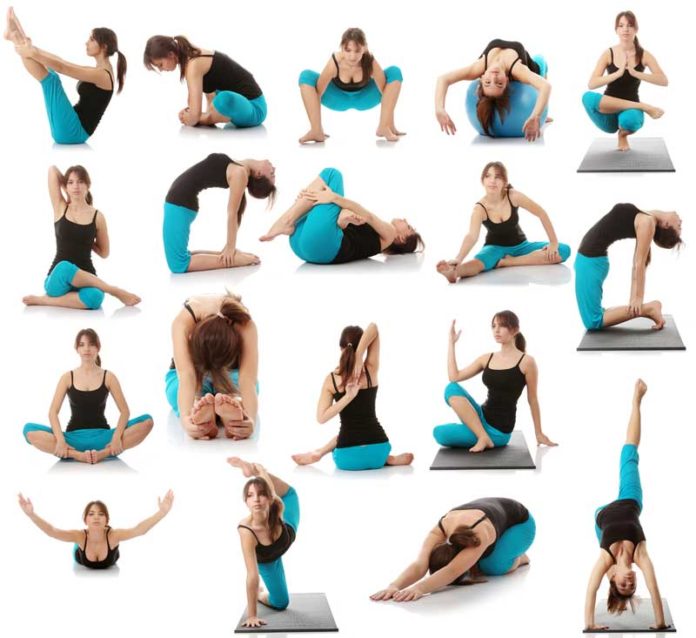
Exercise and Yoga positions
Exercise and yoga positions

So you’re a hot mamma and you want to stay that way throughout your pregnancy. Exercise is a great way to maintain your health and fitness for you and your baby. Talking to your doctor to ensure your exercise routine is both safe and effective is an important part of the process but here are some general guidelines to get you started.

How much is enough?

Generally, all women should be performing moderate intensity exercise at least four times a week, for about 30 minutes. This should pump up your heart and breathing rate but shouldn’t be leaving you breathless. FYI, watching a Johnny Depp movie may leave you breathless but it still doesn’t count as exercise!

However, if you have pregnancy complications you may be advised to exercise less (and possibly cut down on Johnny’s films) so you should talk to your doctor about your particular circumstances.

Even if you didn’t exercise before you got pregnant, you can start now. Just talk to your doctor about what kind of routine will best ease you into exercise without causing distress.

Times, they are a-changin’

When you’re pregnant, you go through many, many changes. Your body is undergoing all sorts of transformations, the most obvious being its shape. As you start getting bigger, running and balancing gets a little tricky and can be very uncomfortable so don’t worry if you can’t do the exercises you are used to.

Another change that may make exercise more difficult is lower blood pressure – meaning you are a little light-headed. You will also want to stay away from jumping or quick, jerky movements in case you damage any important pelvic muscles that you will definitely need later.

Of course, the most important thing is not to cause any harm so you need to be extra careful you don’t stack it! It’s not only embarrassing but very dangerous. Also, remember that your heart rate increases during pregnancy, so be careful not to over-exert yourself.

Let’s get physical: Types of exercises to do

OK, so when you’re pregnant you don’t exactly feel like Olivia Newton-John in the 80s but there are still many exercises you can get in to. Whichever you choose though, always remember to warm up first. Your raging hormones not only make you more sensitive to smell than a blood hound but you’re also more flexible than normal, meaning you may overstretch and hurt yourself.

Walking is definitely at the top of the list for pregnant women, especially if you weren’t exercising before you got pregnant. It gives the whole body a workout and is a great way to exercise at moderate intensity while working the heart. Rope in your partner or a friend for added fun.

Water exercises are great, like swimming or moderate aqua aerobics as they don’t put stress on the joints. They may also help with any leg or back pain pregnant women can experience.

Riding a bike in the earlier stages is okay, although there is always the risk of falling. When your belly grows, perhaps try an exercise bike so you don’t go hurtling over the handlebars.

Resistance training is great but only for women who were doing it before they were pregnant. So just because you’re pregnant doesn’t mean you have to give up that Pump class – just go easy on the weights you use – very heavy weights are not good for you! The same goes with jogging. You can still job, but you may need to lower the intensity.

Don’t go there Sista: Types of exercises to avoid

You’ll have to lay off any forms of more intense exercises. As a general rule, if you need to hold your breath while working out, it’s probably not a great pregnancy workout.

Stay away from exercises where you have to lie on your front or back because this can disturb blood flow to the foetus. You’ll probably want to stay away from exercises that stretch out your tummy, too.

Big no-nos include contact sports, so you’ll have to give up Fight Club for a while, as well as horse-riding, rock climbing or anything involving plummeting several metres. It’s also not good to be exercising at high-altitudes because you can get very short of breath.

Obviously, scuba diving is out of the picture. Not only is there decompression sickness but you don’t want to compress your stomach with under water pressure. Your baby will start to wonder what’s ‘up’, and there isn’t a lot of room in there to start with.

Big Mamma’s House

As you can see, being ‘preggas’ doesn’t mean that you have to stop your exercise routine. In fact, it’s great for both you and your new arrival. Of course, there are limits. Moderate intensity exercise is recommended and also an easier habit to stick to.

All pregnancies are different so make sure you talk to your doctor before you start your exercise in case your particular situation requires less intensity or none at all. The first rule is safety.

More information

Pregnancy and exercise For more information about pregnancy and exercise, including pre-pregnancy exercise, suitable types of exercise, risks and benefits of exercise and exercise myths, see Pregnancy and Exercise.


Exercises to do and avoid during pregnancy For more information on body changes as well as appropriate physical activities during pregnancy, see Exercises To Do and Avoid During Pregnancy.

When to wear a maternity bra

When to start

There is no ‘right time’ to start wearing a maternity bra during pregnancy – when you choose to make the change is completely up to you. Breasts increase in size during pregnancy and many women will find they outgrow their bras fairly early. Breasts begin to increase in size very early in pregnancy because they start preparing to produce breastmilk early. Usually they will stop growing by the time you are four months pregnant, and this may be a good time to have a maternity bra fitted. However, if you outgrow your old bras earlier in pregnancy, you could start wearing a maternity bra earlier. You may also need to upsize your maternity bra later in pregnancy if your breasts continue to grow.

During exercise

Exercising for at least 30 minutes per day during pregnancy and breastfeeding is an important step to ensure you feel good and stay healthy. While there are some exercises you should avoid, for the majority of women performing low impact exercises like stretching and walking is completely safe. However, exercising with large pregnancy breasts can be uncomfortable. You may feel a little off-balance with all the extra weight in front. During exercise is one time when you’ll probably want to wear a bra and a good supportive maternity bra is the best option. It’s important to ensure your bra fits well and gives your breasts plenty of support.

In bed

If you feel more comfortable wearing a bra to bed during pregnancy or breastfeeding, you should wear your maternity bra. However, it is a matter of personal choice and there is no need to wear a bra if you don’t want to. If you do choose to wear a bra, it may be because you like the extra support, or it may be to hold nursing pads in place to catch any milk that leaks from your breasts during the night. Make sure your bra is comfortable. You may like to purchase a special sleep maternity bra. Some women find that wearing a soft crop top is sufficient when they are sleeping.

After childbirth

The maternity bras you wear during pregnancy will also serve you after childbirth. Your breasts are likely to be tender and swollen after you have given birth. They may also be leaking breastmilk. In this period your maternity bra will not only provide extra support for your breasts, it will also hold breast pads in place to absorb any milk leaks. Don’t forget to throw in a maternity bra or two when you’re packing the bag you’ll take with you to hospital. Wearing a well-fitting bra that does not restrict breast is also important for the duration of breastfeeding.

References

- Advertisement -

Sign up to receive the latest parenting news, competitions, health information, baby/child/whole family recipes, play ideas, outings, personal stories and much more.

Subscribe