Age
2-8 years
Duration of activity
This activity will take 15-30 minutes (or even longer!) depending on your child’s age and the ways they choose to decorate the egg or card
Materials/equipment
- Printable Easter Egg to Decorate or Easter Egg Card to Decorate. You will need to print one sheet for each egg or card you want to give away.

- For 2-4 year olds the Easter egg will be easier because it is bigger and does not need to be folded or cut.
- Older kids will enjoy the extra challenges of folding, cutting and drawing or pasting smaller decorative patterns
- Scissors- make sure they are blunt nose scissors that are safe for children to use.
- For drawing and colouring options- Colouring pencils, crayons or markers
- For pasting option- paste or a glue stick and decorations to stick on. You shouldn’t need to buy these. If you don’t have time to do an Alternative Easter hunt to find natural decorations like leaves and flowers, hunt around the house for old wrapping paper or magazines, or anything else that is colourful and flat.
Cost
This activity is inexpensive- all you need is a printout of the worksheets. The materials you need for decorating like paste and pencils, you’ll probably already have. You’ll be able to find plenty of decorations to stick on the eggs or cards in the great outdoors or around the house.
Preparation
- Print the Easter Egg or Easter Card worksheet. You may want to print several copies so your child can give Easter cards to more than one of their friends or relatives.
What to do
- Show your child the worksheet and explain that now it looks like a plain old egg, but with some colourful decorations they can turn it into a special Easter egg.

- If you are using the Easter card:
- Explain to your child that to turn the egg into a special Easter card they need to fold it in half so it opens up like a card. Get them to fold the paper in half along the dotted line. Until about six years of age they probably won’t be able to do this themselves, so give them a helping hand or do it for them.
- Give them a pair of scissors and ask them to cut around the outside of the egg to make an egg shaped card. You can do this step at the end but if you are pasting on decorations (see options below) it’s probably easier to do the cutting first.
- Ask them to write (help them or do it for them if they are younger) a special Easter message for someone they love. They can give them the card when it’s finished.
- If you are using the Easter egg there is no need to fold. Your child can cut around the egg shape if they would like to but this is not necessary.
- Ask your child to decorate the egg to make it a special Easter egg. See the ideas below for different ways to decorate.
Decorating idea 1: Drawing, colouring and painting patterns
- Give your child colouring pencils, crayons, paints and/or markers to draw the decorations.
- Instruct them to draw a special Easter pattern on the egg. Depending on their age they may like to draw:
- Shapes like circles, squares and triangles;
- Line patterns with curved, zigzag and straight lines;
- Easter pictures like Easter bunnies and carrots.
- When they have drawn the patters ask them to colour them in or paint over the top of them (this works best when the patterns have been drawn in wax crayon). Encourage them to colour as neatly as possible and stay within the lines (although depending on their age they may not yet be able to).
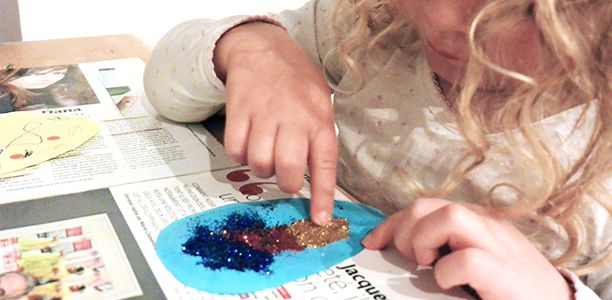
- Stickers, glitter or sequins, all of which are fiddly to stick and a great way to develop fine motor skills.
Decorating idea 2: Stencilling and colouring patterns
- Give your child pencils and stencils to decorate the eggs. For stencils you could give them Rulers;
- Cut outs of Easter pictures like bunnies and eggs to trace around (or cookie cutters if you have them are good for tracing shapes);
- Stencil patterns involving lines and shapes that they trace the inside of.
- Ask them to decorate the egg with a special Easter pattern;
- When they have drawn the pattern ask them to colour it in. For older children encourage them to match the colours in different parts of the pattern that are the same (e.g. colour both the zig-zag lines yellow) to make this more challenging.
Decorating idea 3: Pasting natural decorations
- Go for a walk and hunt for natural decorations. For example you could use:

- Leaves, either whole or crumpled up;
- Flowers, either whole or individuals petals;
- Small sticks;
- Blades of grass;
- Sand or different coloured soil.
- Give your child paste or a glue stick to attach the natural decorations to their egg. It’s a good idea to put down a washable sheet or piece of newspaper so the glue doesn’t end up everywhere. You may also want to ask your child to put on an old piece of clothing they use for art and craft.
- If you are decorating a folded card, it’s a good idea to open it out and lie it flat before they start decorating, but remind them to only decorate the front side of it.
- Get them to apply glue or paste to a section of the egg they want to start decorating.
- Next get them to put the decorations they want to use for that section.
- Repeat for other sections until the entire card or egg is decorated.
- Put it somewhere safe to dry.
Decorating idea 4: Pasting recycled decorations
- Hunt around the house with your child for things you can recycle to turn into decorations. For example you could use:
- Old wrapping paper;
- Old glossy magazine;
- Wrappers from chocolate Easter eggs or other food wrappers;
- Dry food like rice or macaroni, or you could make coloured rice or coloured pasta to use for this activity.
- Follow the instructions for pasting natural decorations.
Activity 5: Decorated Easter egg garland
- When your child has decorated a few eggs, use them to make a garland.
- Take a piece of string or ribbon and use sticky tape to attach the back side of the eggs to the ribbon. Spread them evenly along the ribbon.
- When all the eggs have been stuck on, hang the garland on the wall by attaching tape to each end of the ribbon. Use good quality tape so that it does not mark or remove paint from the wall when the garland is taken down.
Tips
- As you decorate the eggs talk to your child about the things they draw. For example ask them to identify the shapes and colours that they use, or talk about how they feel about the things they have drawn (e.g. bunnies and Easter eggs).
Extension activities
- For older children, using a ruler to measure lines and pictures that they have drawn is lots of educational fun.
Educational outcomes
Mathematical skills
Decorating Easter eggs and cards provides opportunities for children of all ages to develop their mathematical skills. 2-4 year olds will have opportunities to develop their mathematical vocabulary (e.g. words to describe size, colour and shape) and understanding of a range of mathematical concepts which are best learnt in early childhood. These include:
- Learning to count (e.g. when they count how many decorations they have drawn or pasted, or how many eggs are hanging on a garland),
- Recognising shapes (for example when they identify circles, squares and triangles they have drawn as decorations);
- Understanding size (e.g. when they compare the size of the Easter egg and card or talk about the big and small decorations of their eggs); and
- Recognising colours (e.g. when they name the colours they have used in the decoration).
Older children will:
- Develop their understanding of sorting and classifying by drawing patterns (and copying patterns they have drawn on one egg to another). This is something children aged 5-6 years will probably enjoy and benefit from doing.
- Measuring and using mathematical language to describe the difference sizes of the eggs, lines in the pattern and width or length of the pictures they have drawn. This activity will be enjoyed and educational for 6-7 year olds.
- Do simple addition and subtraction, for example by adding the number of squares and circles together or subtracting the number of straight lines from the number of curved lines. Children will be beginning to do addition and subtraction by age 6-7, although at this age they’ll probably still need to use strategies like counting one (e.g. counting all the straight lines and then continuing to count the curved lines one by one to add them up). By 7-8 years of age they will be getting a better grasp on addition and subtraction and probably be able to calculate answers in their head or by writing an algorithm (e.g. 7 + 6) on paper.
- Identifying symmetrical parts of the decorations, for example that the card is symmetrical when it is opened out or the egg has two symmetrical sides when you draw a straight line down the middle. By 8 years most children have an understanding of symmetry.
Fine motor skills

Children will get many opportunities to develop their fine motor skills or the ability to do fiddly tasks using fingers (which provide the foundation children need for writing, turning pages, touching screens and picking up objects throughout their life) decorating the eggs and card. Learning to hold a pencil and use it purposefully to make marks, write, stencil or draw strengthens the finger muscles and helps children develop control over the implements they use for writing. Picking up small objects like sequins, stickers and petals to glue on the eggs helps children develop their pincer grasp, that is, the ability to pick up objects using only the thumbs and index finger.
Two year olds will probably draw circles that don’t meet at the ends and scribble, but most can already pick up and hold crayons andpencils steadily. Three and four years olds will have much better developed fine motor skills and these will enable them to control a pencil fairly well, for example they’ll probably be able to colour-in neatly and draw shapes accurately.
Cutting is also a great fine motor activity. Expect a bit of a mess and give lots of assistance until your child is five or six years old. But from about age two years, children will be able to cut (even if it’s only to make a single cut at the edge of the page), so let them start and help them when they get stuck. Between three and four years of age they’ll be starting to make several cuts towards the inside of the paper, before beginning to cut straight lines by about five years. Most children will be able to cut a curved line at around age six.
Folding and pasting are also things that young children will benefit from having a go at but won’t be able to do themselves. The ability to fold a piece of paper on a straight line usually develops around six years. Young children will enjoy working with paste but they’ll probably use huge dollops and have difficulty spreading it on the page until they’re four of five years old.
Having conversations about what they do helps children develop social and communication skills. Just talking with your child while doing these Easter crafts will help them learn the rules and art of communicating. For example, young children will learn to respond to a question and take turns speaking. Help by asking questions and waiting for their response. Make sure you answer their questions. Encourage them to use new words and more complex grammar, and help them by pronouncing words clearly and using appropriate grammar when you speak (for example using full sentences instead of individual words).
Communication and social skills
Easter has different meanings for different people. Doing the Easter worksheets with your child is an opportunity to talk about what Easter means to you, and perhaps also to others. Four-six year olds will come to better understand culture and how different beliefs are a part of culture as well as community and how their community include different people who have different beliefs about Easter.
Language and literacy skills
Listening and speaking helps young children develop their language skills. They’ll have plenty of opportunities to talk and listen as you do these Easter craft activities. Seeing printed words and reading or writing will develop literacy skills for children of various ages.
Two year olds will be developing language and literacy skills when they:
- Listen to and follow instructions involving one or two steps, for example draw a shape on the egg;
- Using words like to correctly name objects on the page, for example by pointing and saying ‘red’ (even if the object they point to is not actually red);
- Marking and scribbling on paper and being interested in using writing tools.
- Three years olds will improve their language and literacy when they:
- Watch you read instructions to them from the worksheet and point to the words on the page as you read;
- Expand on your discussion, for example if you say, ‘I see circles,’ they may continue by saying, ‘I see a big circle and a small circle’;
- Pretending to read instructions and pointing at the words when they already know what they need to do;
- Read their scribbles to you;
- Try to write their name by looking at their name you have written.
Four to five year olds will improve and demonstrate their language and literary abilities by:
- Using complex grammar for example proper sentences (e.g. words like ‘a’, ‘an’ and ‘the’) Instead of pointing and saying, ‘egg’ they might say, ‘I see an egg on the worksheet.”
- Sounding out parts of the words as they read.
- Attempting to read the instructions on the page by themselves.
- Writing their name on worksheets from memory (although they might get a few back to front)
- Asking you what writing says if they are unable to read it themselves.
Six to seven years olds will:
- Understand that what we say can be written down using letters and know how to write a range of simple and common words.
- Understand that writing and speech are different ways of communicating and the way we write is different from the way we speak, for example the structure of a letter is different to what we would say if we saw the person.
- Write using some upper and lower case letters and simple punctuation like commas. The range of punctuation they use and their understanding of what it means (e.g. that when a question mark is at the end of a sentence it denotes a question) will increase considerably from six to seven years.
- Understand different uses of capital letters, for example that sentences and people’s names begin with a capital letter.
Seven to eight years olds will:
- Understand that different types of writing have different purposes (e.g. that writing the message in the Easter card has a particular purpose which is different to writing a birthday message or a story).
- Write using unjoined upper and lower case letters. They will become increasingly fluent with writing and write more neatly as they age.
- Understand spelling and how some words have unusual spellings, that is, that they do not make the sound usually expected of their letters. For example they might learn that the sound of ‘ch’ in their friend Michelle’s name is different to the usual sound in chicken or that some words include silent letter.
- Use compound sentences to join their ideas together in writing, for example use ‘and’ to join two simple sentences together.
References
- Virginia Early Childhood Development Alignment Program. Milestones of child development- A guide to young children’s learning and development from birth to kindergarten. 2009. (cited 26 July 2013). Available from: (URL Link)
- Australian Curriculum and Reporting Authority. Australian Curriculum- Mathematics. Undated. (cited 2 October 2013) Available from: (URL Link)
- Australian Curriculum and Reporting Authority. Australian Curriculum- English. Undated. (cited 2 October 2013) Available from: (URL Link)
- Andrews M. General Categories of Fine Motor Development. Michigan State University Extension. UNDATED. (cited 28 March 2014). Available from: (URL Link)


 (5 votes, average: 4.20 out of 5)


