Age
For an adult to do with babies and older children.
Duration of activity
10-15 minutes
Materials/equipment
- Play-dough (generally 150 grams for a small baby or 300 grams per hand or foot mould for a toddler)
- Plaster of Paris (also sometimes called sculpture plaster)
- Water
- Measuring jug
- Spoon for mixing
- Large old bowl/plate for putting mould into
- Spray paint (colour of your choice optional)
- Box frame (optional)
- All purpose glue (optional)
- Coloured card (optional)
- Photo of child (optional)
- Sandpaper (optional)
Cost
The cost of this activity will be about $40 if you need to buy the Plaster of Paris (but you will have a lot leftover for future crafts), spray paint and you are using a box frame.
Buy the Plaster of Paris from a DIY warehouse rather than an art and crafts shop – it will be a fraction of the price.
You can buy cheap varieties of play-dough or make your own – you are going to throw it out after making the craft.
What to do
- Roll playdough into a ball and flatten slightly and place in an old bowl or plate.
- Push child’s flat hand or foot into playdough to make a deep imprint. If you don’t do a deep enough imprint, the final mould will be very delicate – the deeper it is, the more durable it will be.
- Make up the plaster of Paris to packet instructions in a measuring jug – generally 1 part plaster to 2 parts water.
- Quickly mix the plaster and water to form a smooth paste and pour into playdough mould.
- Clean your jug, spoon or any surfaces where plaster landed immediately. Once the plaster dries it is much harder to clean.
- Leave the plaster mould to dry for 24-48 hours.
- Gently remove the playdough from the plaster mould – being careful around delicate toe and finger areas especially if your mould was not deep.
- Put the mould in a sunny spot where it can dry out for up to a week – this will ensure it never grows mould.
- You can sand back some of the rougher plaster edges if you like (optional).
- Spray paint the mould (optional).
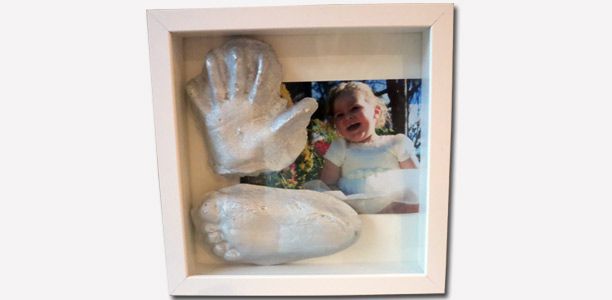
- At this point you could put the mould into a pretty box with tissue paper, with a little card stuck to the box stating child’s name and age at time of the mould and store as a keepsake or give as a gift, or you could frame the mould in a box frame
- Print a photo to the size of the box frame or of a smaller size – depending on your taste.
- Advertisement -
Date Created: August 21, 2013
Date Modified: August 22, 2013 


 (11 votes, average: 4.18 out of 5)


